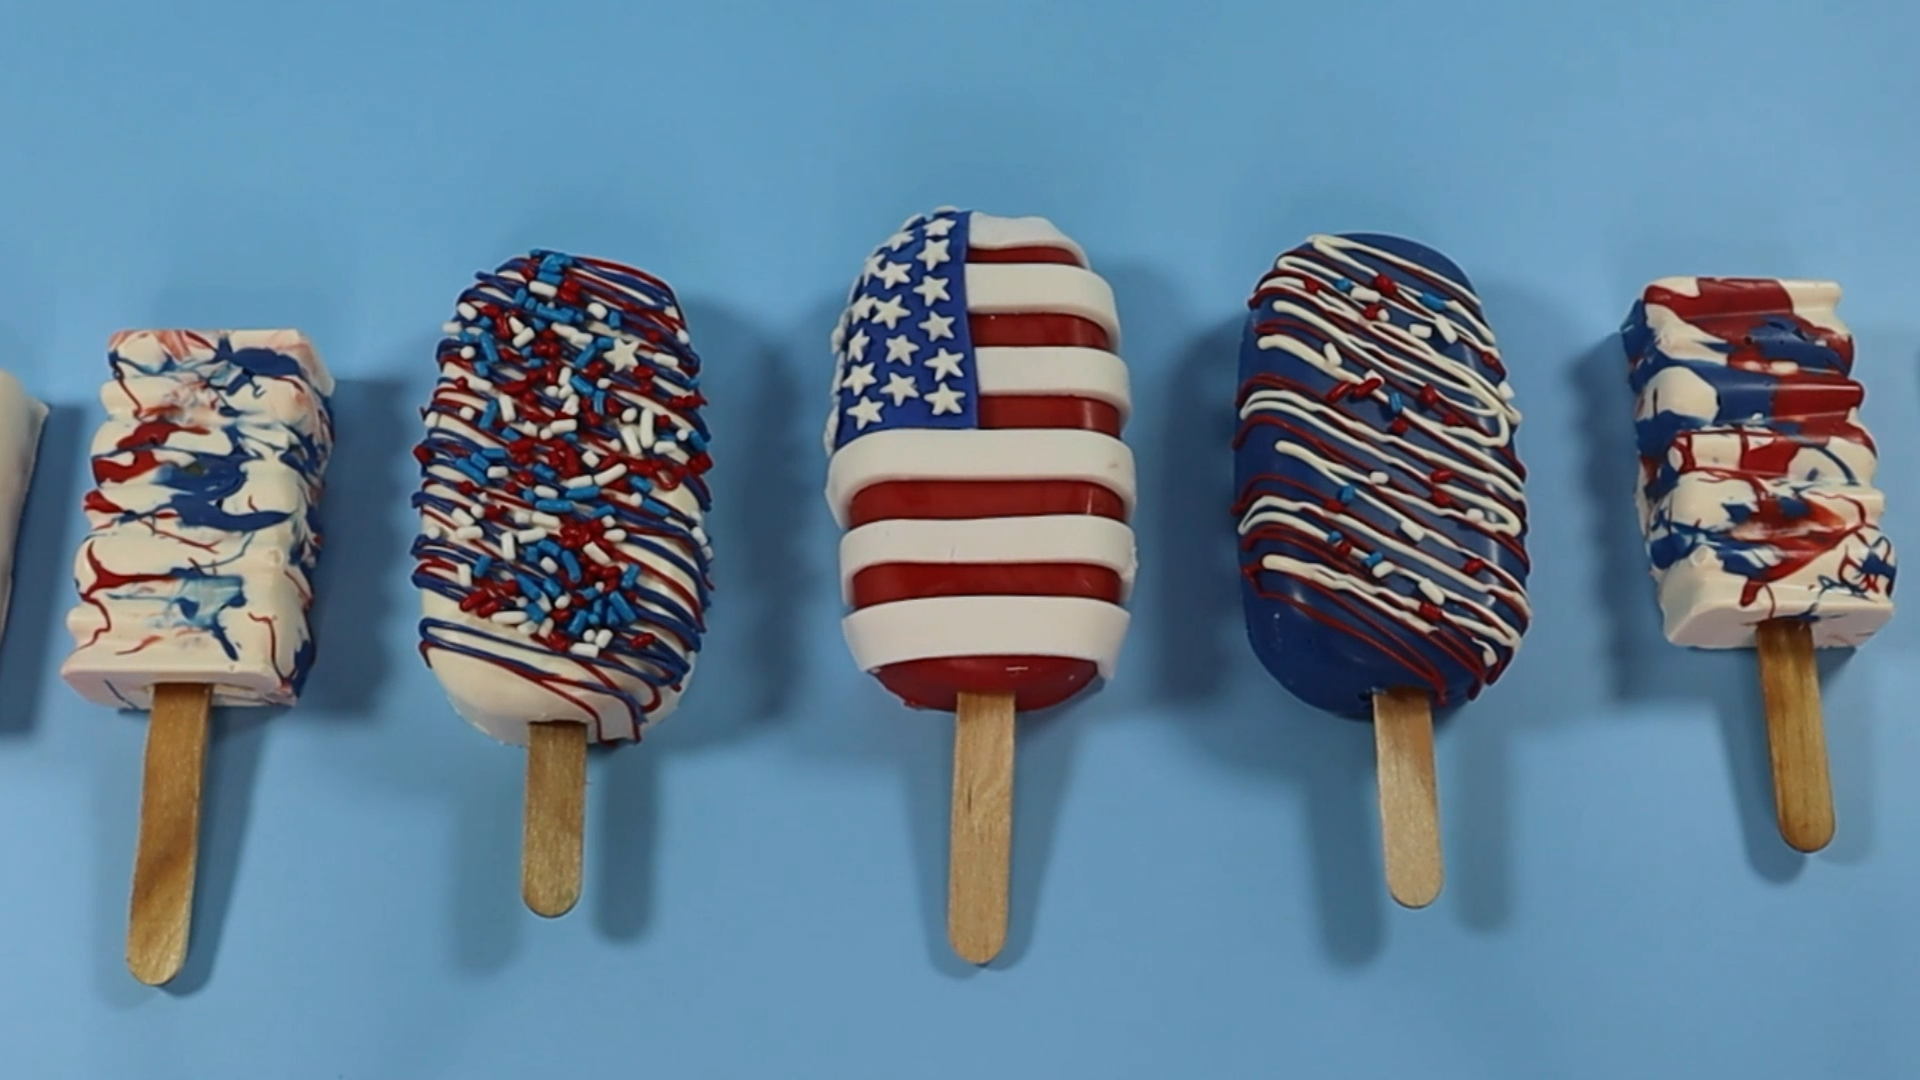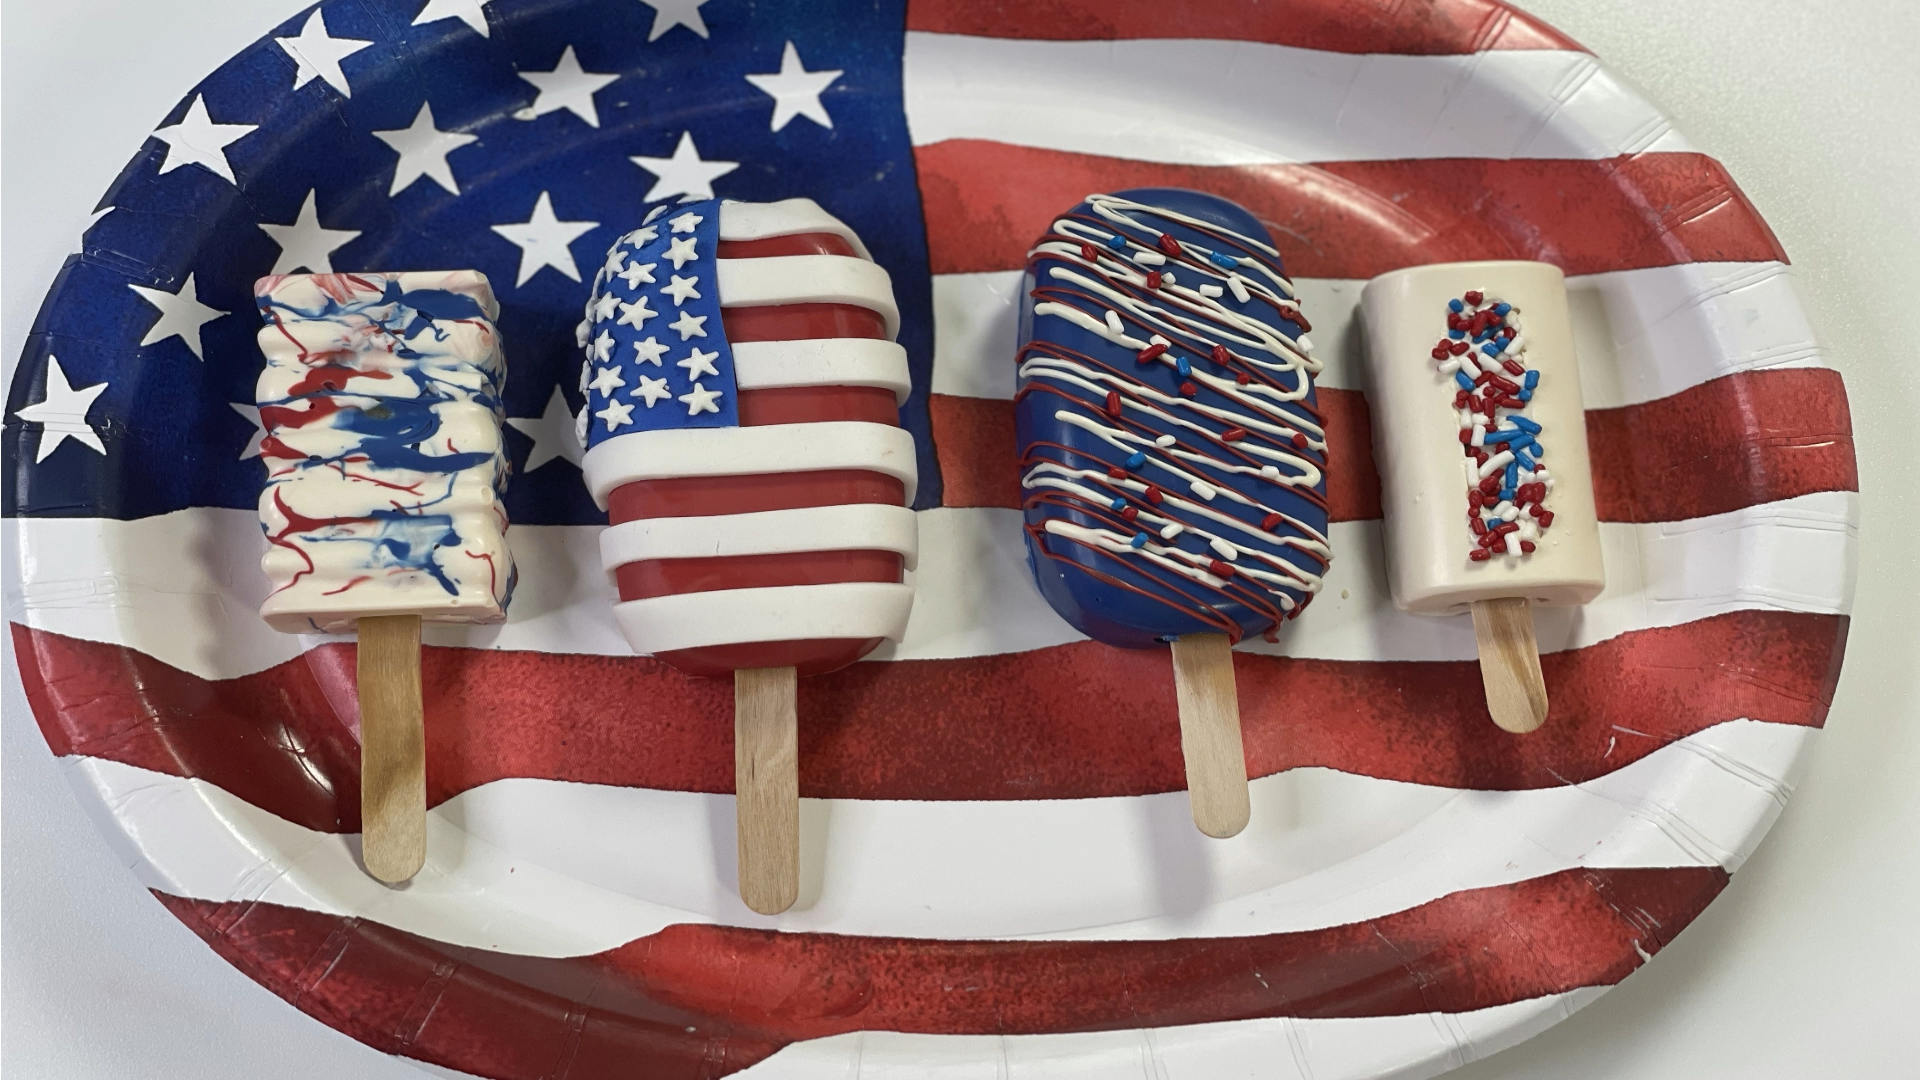
Get into the spirit this Fourth of July with red, white and blue patriotic decorated cakesicles. Are you not on the cakesicle wagon yet? Forget cake pops, they’re so last season. These bites of cake heaven on an ice cream stick have caught the fancy of all. I love how versatile a canvas cakesicles are. They can be adapted to any theme and for any event, not to mention they are super cute, delicious, and charming. For me, cakesicles are a great way to use up the leftover cake and cake scraps. If you’re a beginner, making them is WAY more forgiving than cake pops. Here I’m showing you four different, easy ways to make cakesicles for your backyard BBQ, firework watching party, or any other way you celebrate America’s birthday.
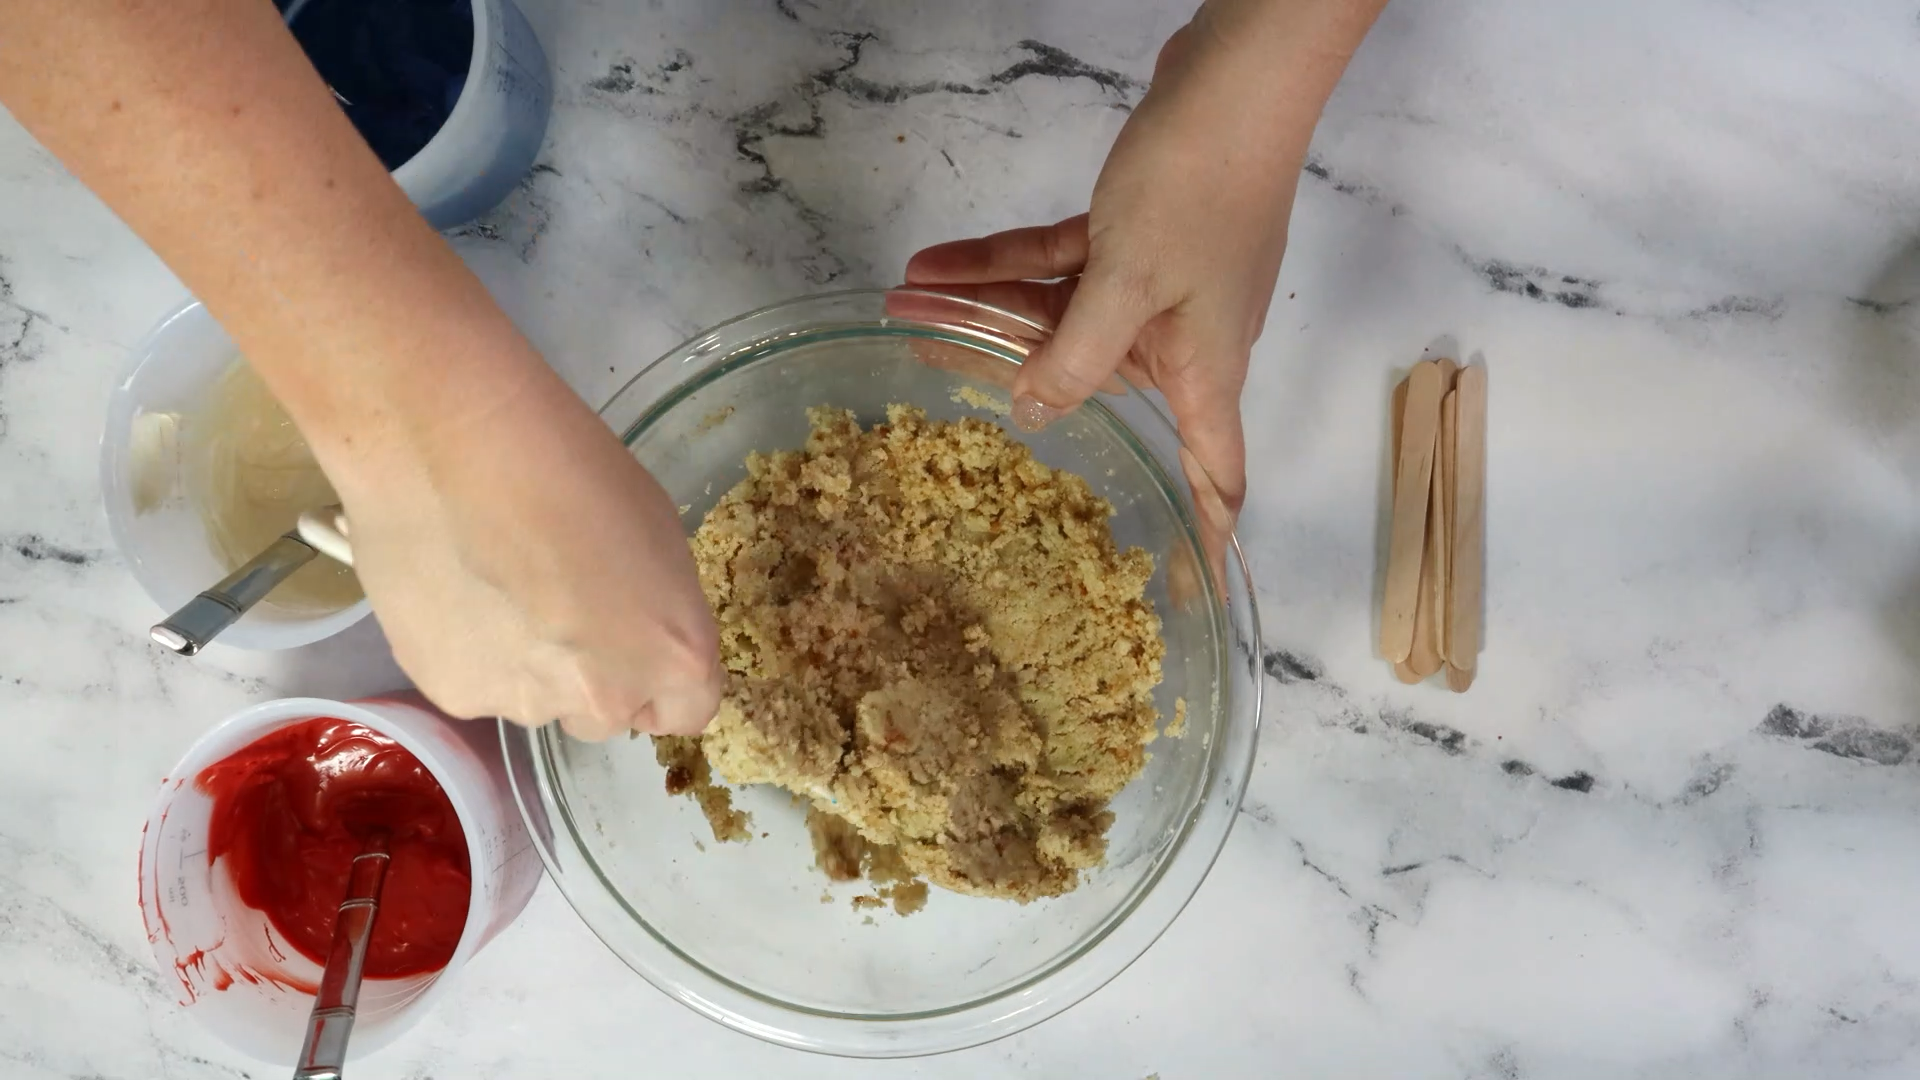
To make our cakesicles I will be using a variety of silicone molds, candy melts in red white and blue of course, and a variety of sprinkles. Start by creating our cakesicle dough. I’m using a six inch cake of my classic vanilla cake recipe that I’ve cooled in the fridge and American buttercream frosting as my dough binder. Break the cake into crumbs and add frosting. Then mix until it combines into the dough mixture.
Let’s start with drizzled cakescicles. Begin by coating the mold with melted chocolate. Using a spoon place melted chocolate in the cavity and cover the bottom, then smooth it up the sides. This layer will be the front of the cakesicle so make sure there are no open spaces for the dough to play peek a boo. Give the mold a little shimmy to evenly disperse the chocolate and get rid of air bubbles. Then it’s off the refrigerator until the chocolate is firm.
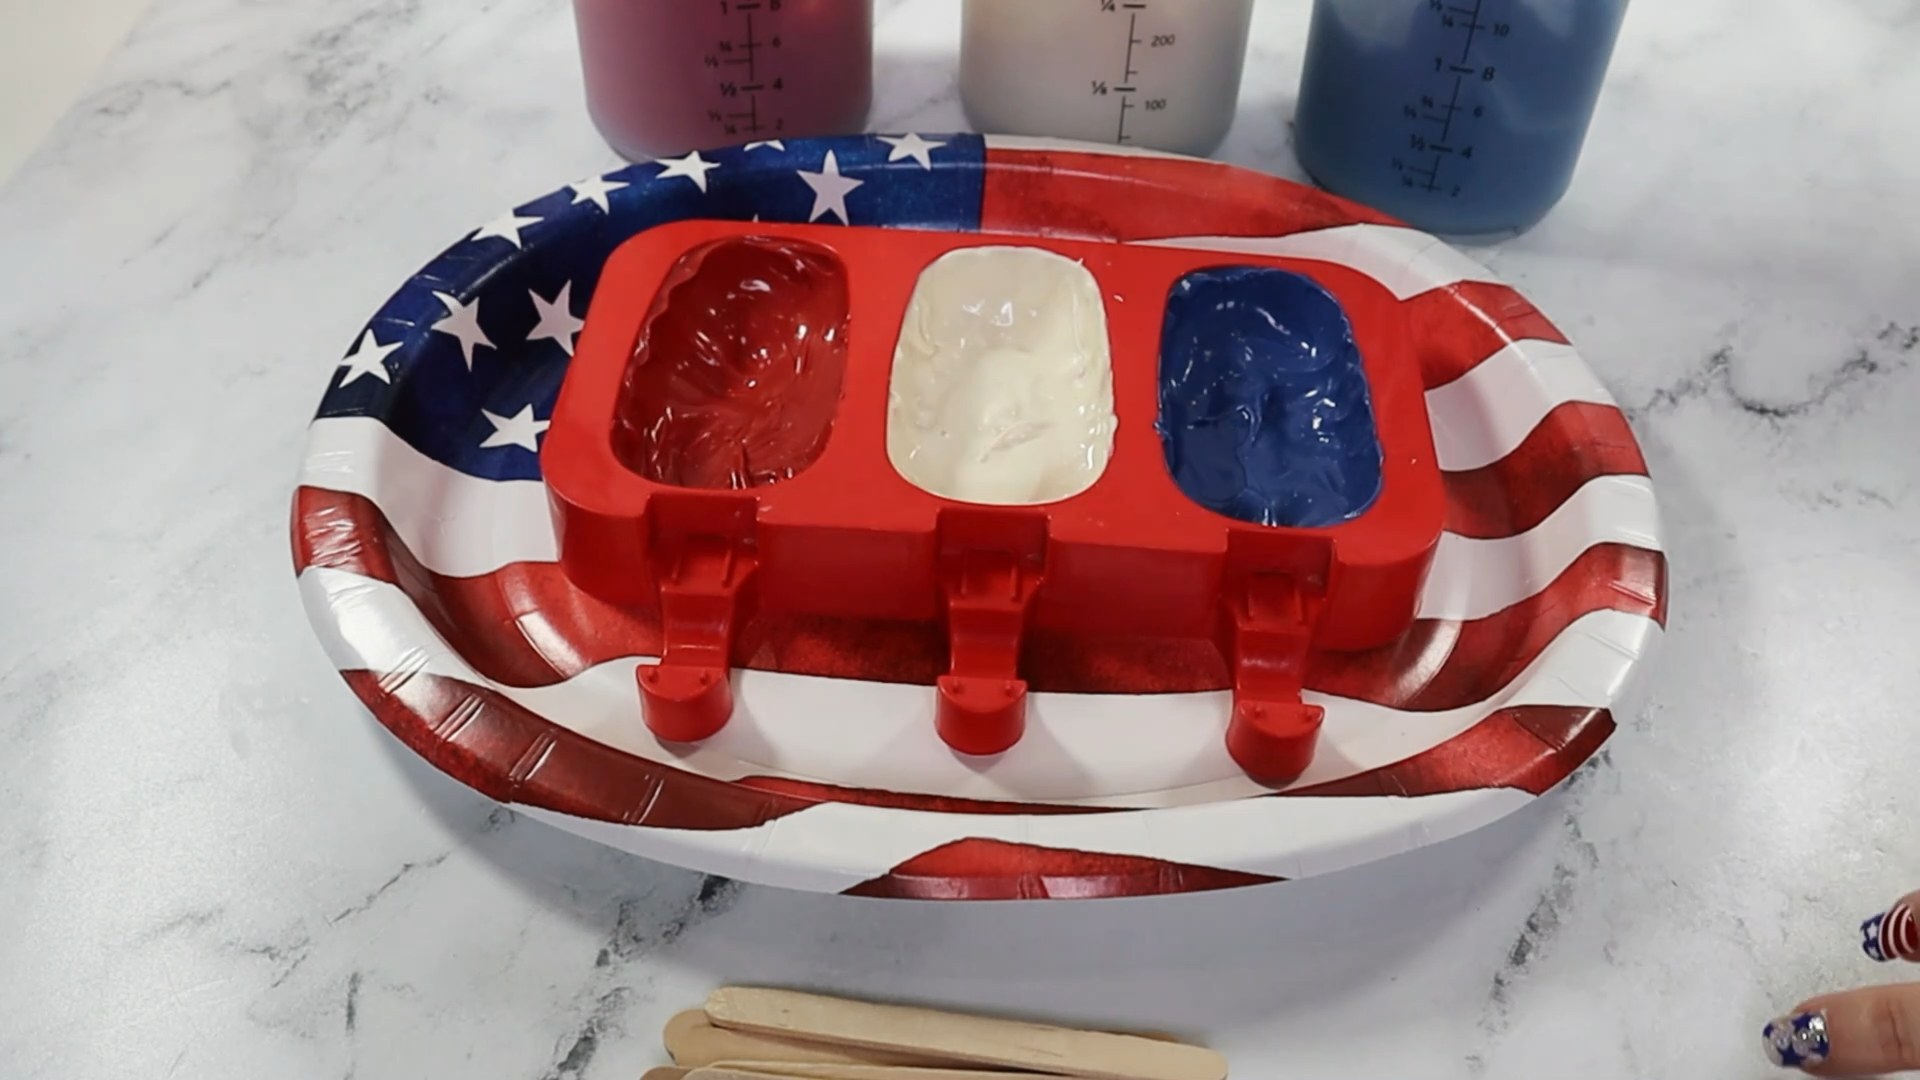
Once firm, place dough into each cavity, packing it down with the spoon or your fingers. Make sure not to fill it over the edge or lip of the mold. This will ensure the chocolate backing will have an even edge and cover the dough properly. Next encase the dough with more chocolate. Use blue to cover blue, white for white and red for red. But you can always mix and match for some extra fun. Don’t forget to insert that popsicle stick. Refrigerate until the chocolate is hard, then you can remove the popsicles for decorating. If your cakesicle edge is less than neat, here’s a great tip on smoothing those out. Place a knife or even an offset spatula in a cup of hot water, pat dry and use to smooth down that rough edge.
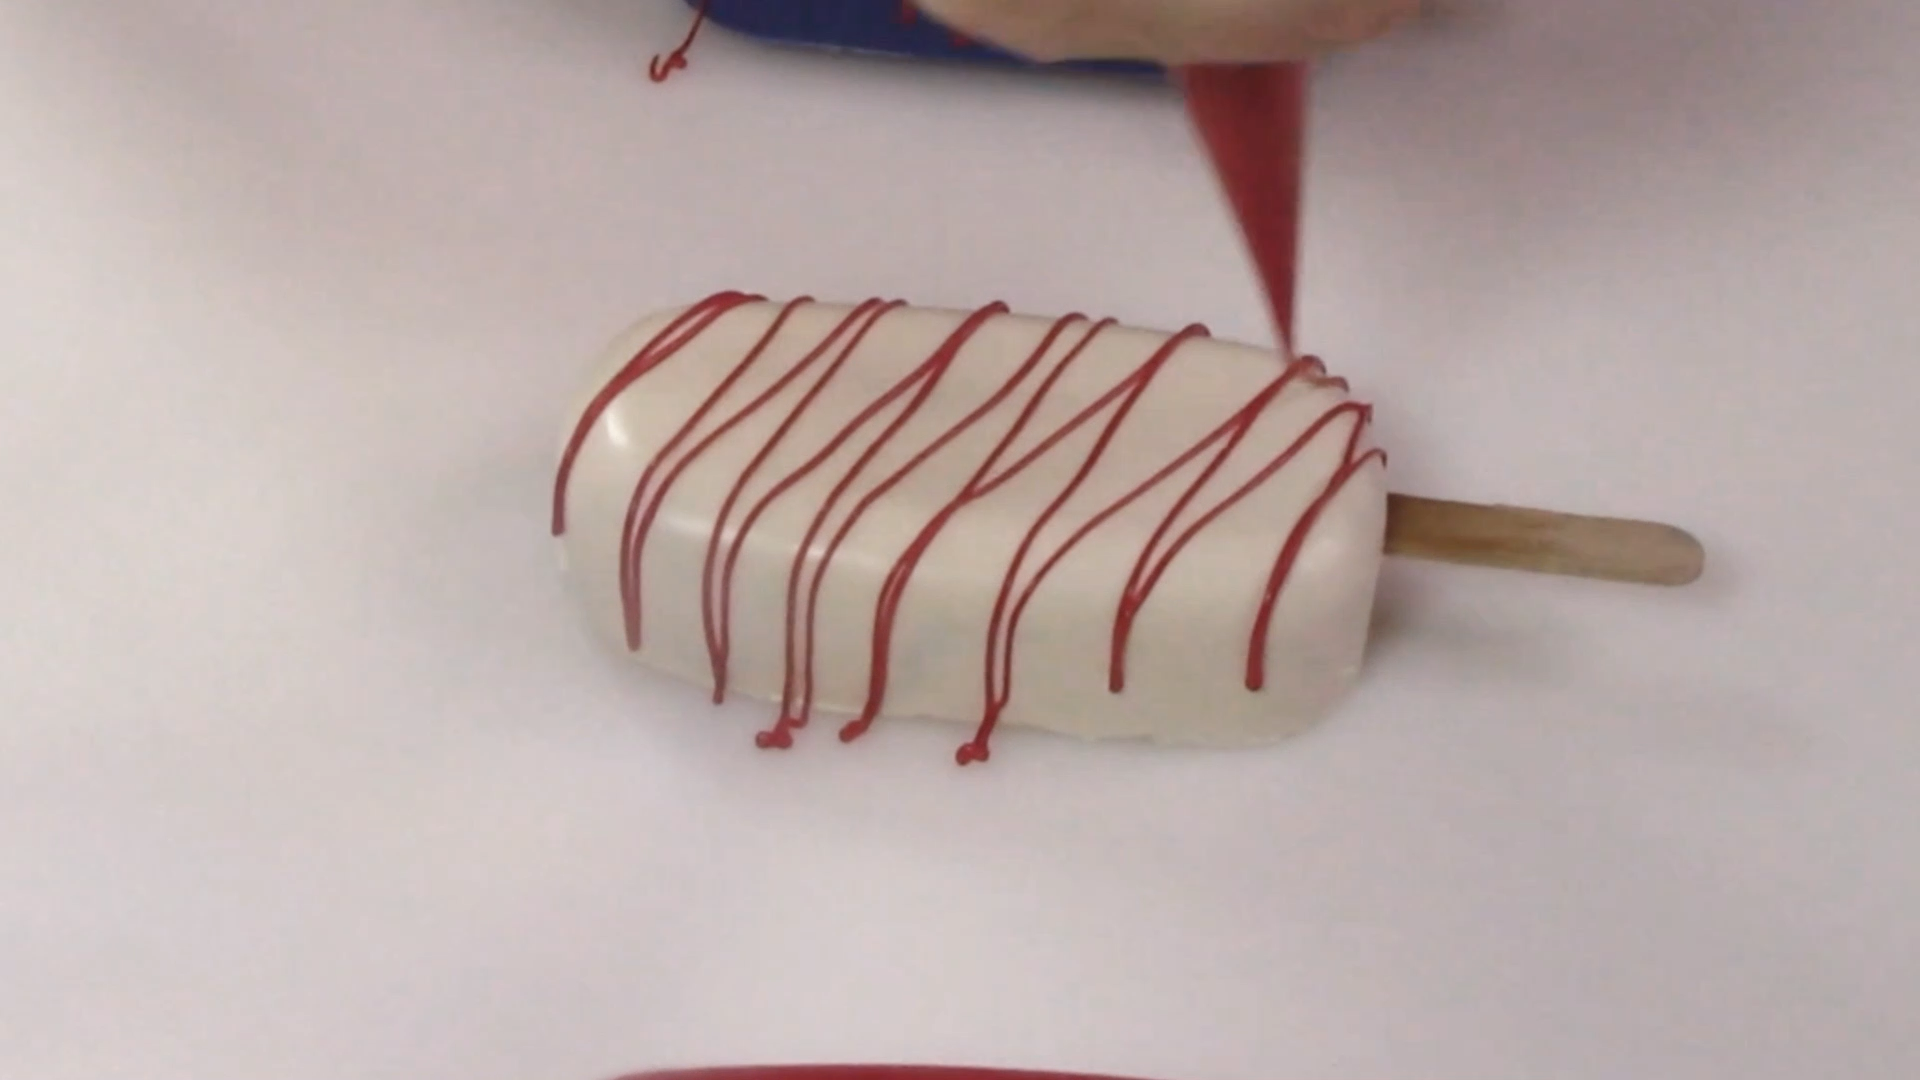
To drizzle I’m using a piping bag and I always test to make sure the chocolate flows properly. Then start drizzling. I’m making diagonal stripes, but you can make swirls, dots, however you want to add some pizzazz. I’m drizzling opposing colors, but let your creativity run wild, there’s no rules. When the drizzled chocolate is still wet it acts as glue. After drizzling spoon some sprinkles on top.

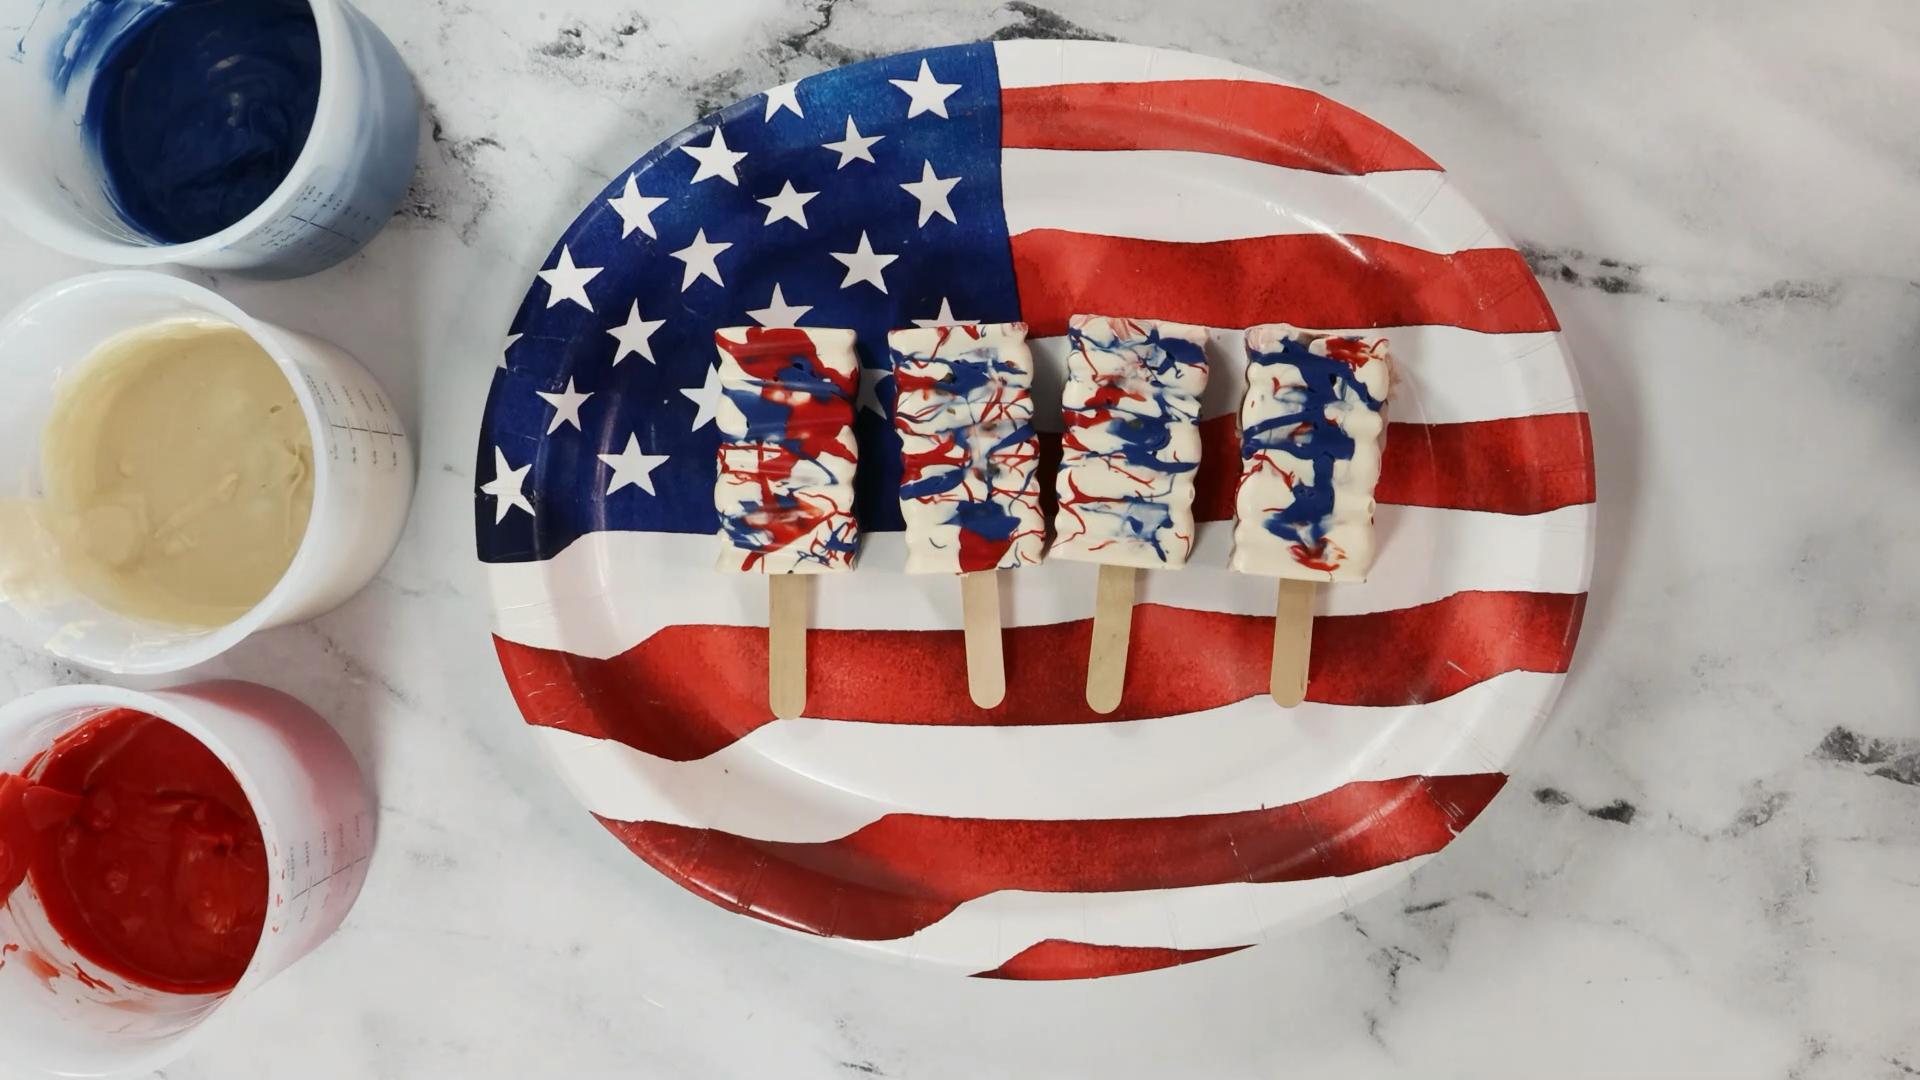
Next, let’s make firework cakesicles. I’m using a mold with some pattern on it for these. The big difference is the chocolate bottom, or front. Instead of covering it evenly, we’re going to make a splatter of color, like a firework. If you have kids, they will have a blast, pun totally intended, making these. Think Jackson Pollack for cakesicles. I use one color to cover, white because it’s the lightest and will allow the other colors to pop. The blue and red are swirling with the white in a soupy mess and the result will actually be a beautiful blending, and no two of these will ever be alike. Don’t forget to completely cover the side as well. Then it’s off the fridge to chill.
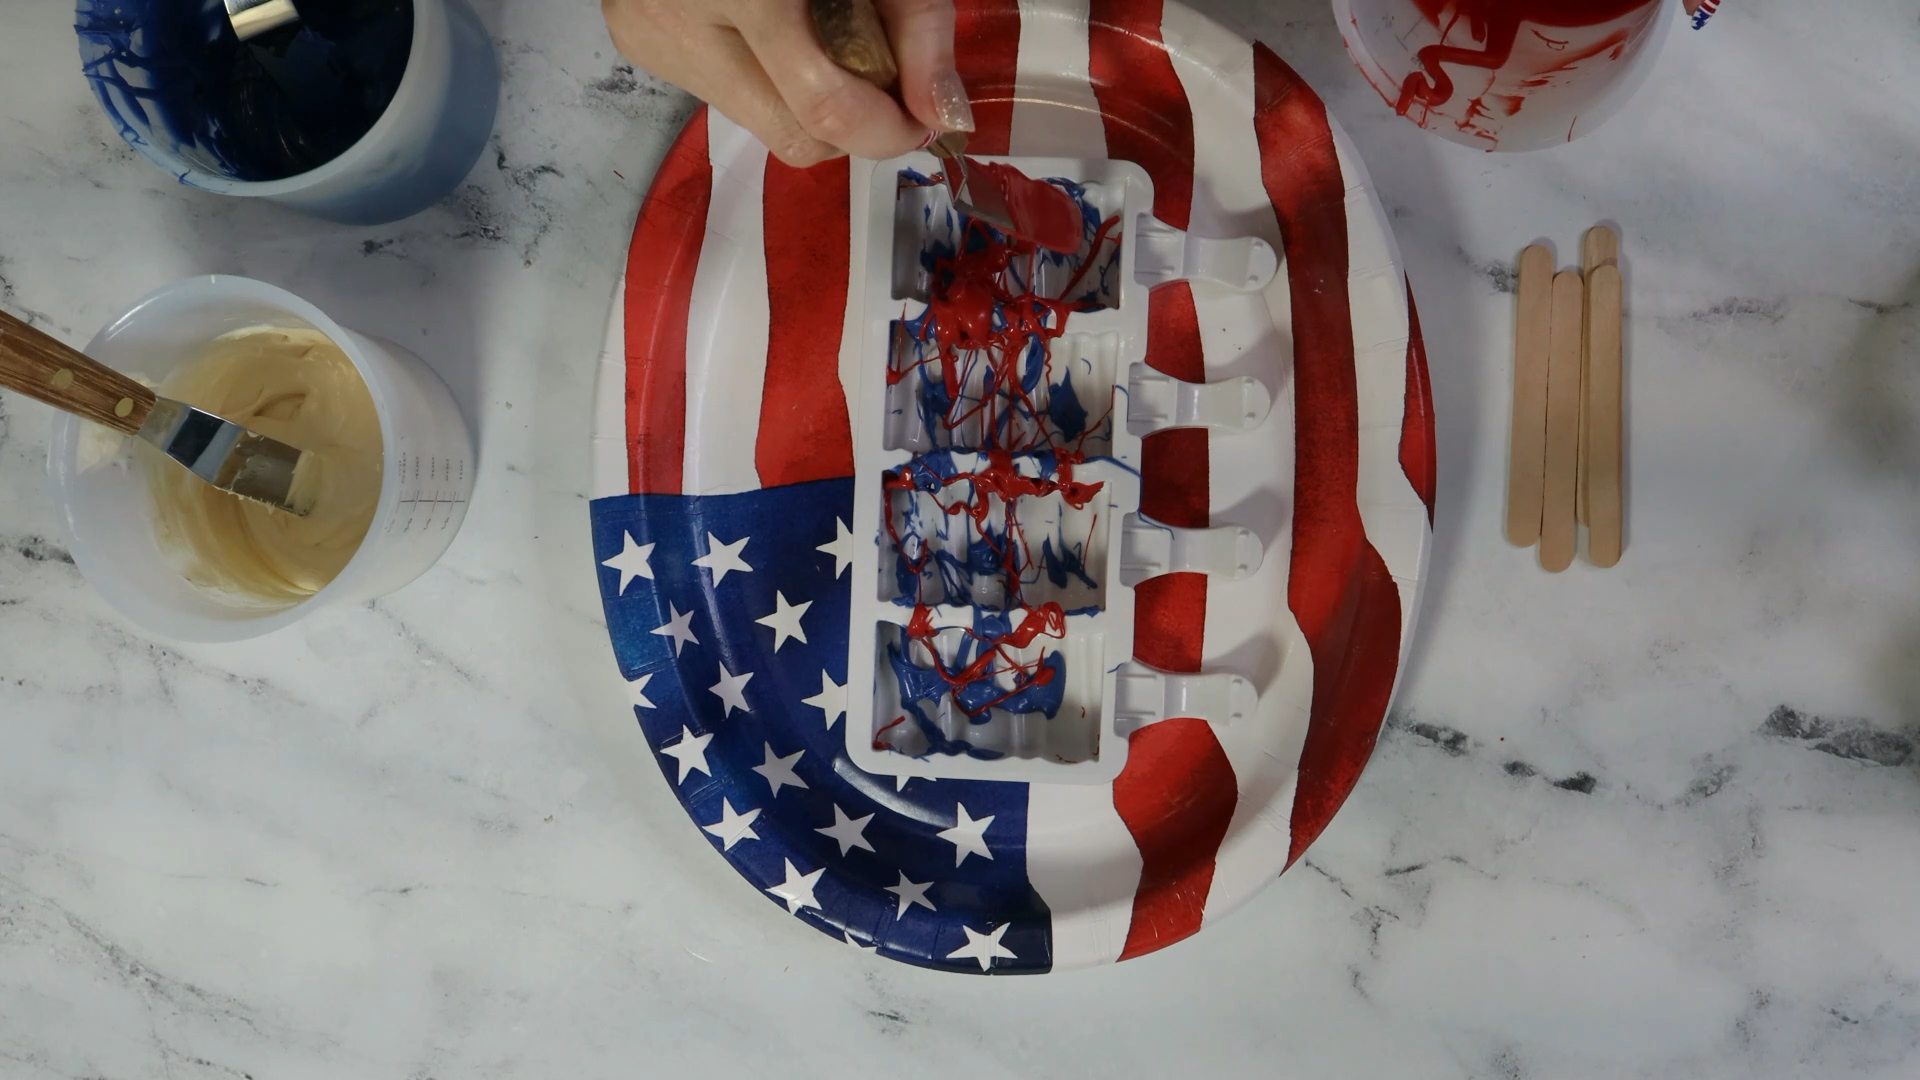
Fill with dough, but not above the lip and cover with more chocolate. Because my main color was white, I’m sticking with it, but feel free to mix it up. For extra added effect, you could swirl the back. Give a shimmy so it evenly spreads and back into the fridge to cool. Removing these are my favorite because you have no idea what they will look like and I love how different each one is. That’s what makes these fun.
Next let’s make sprinkle center cakesicles. This mold features an indentation in the center. That’s where our sprinkles are going to go. Begin like before, fill the cavity with melted chocolate, making sure to use the spoon to cover the sides, then off to the fridge to chill. Remove from the mold, when firm so you can see the indentation where the sprinkles will go. For the center, add a little chocolate glue and smooth it down. Now add sprinkles. Easy right?
Next up: the American flag.
Similar to the drizzles at the beginning, coat the mold with red chocolate including the sides and chill. Then add the dough mixture and cover with more red chocolate. Give a shake, insert stick and set aside to chill. To decorate you will need white and blue fondant, a rolling pin, water, a brush for the water, and a knife. Start by rolling the blue fondant for the flag. You want the fondant to be thin, about 1/8 of an inch. Roll a circle, trim it in half, and then cut that in half so you have one quarter of a circle. Use a brush to paint a layer of water to use as glue, then cover the upper left part of the red cakesicle. Fold the excess down and trim so it’s flush. Smooth the fondant over to so it’s straight and now you have your blue.
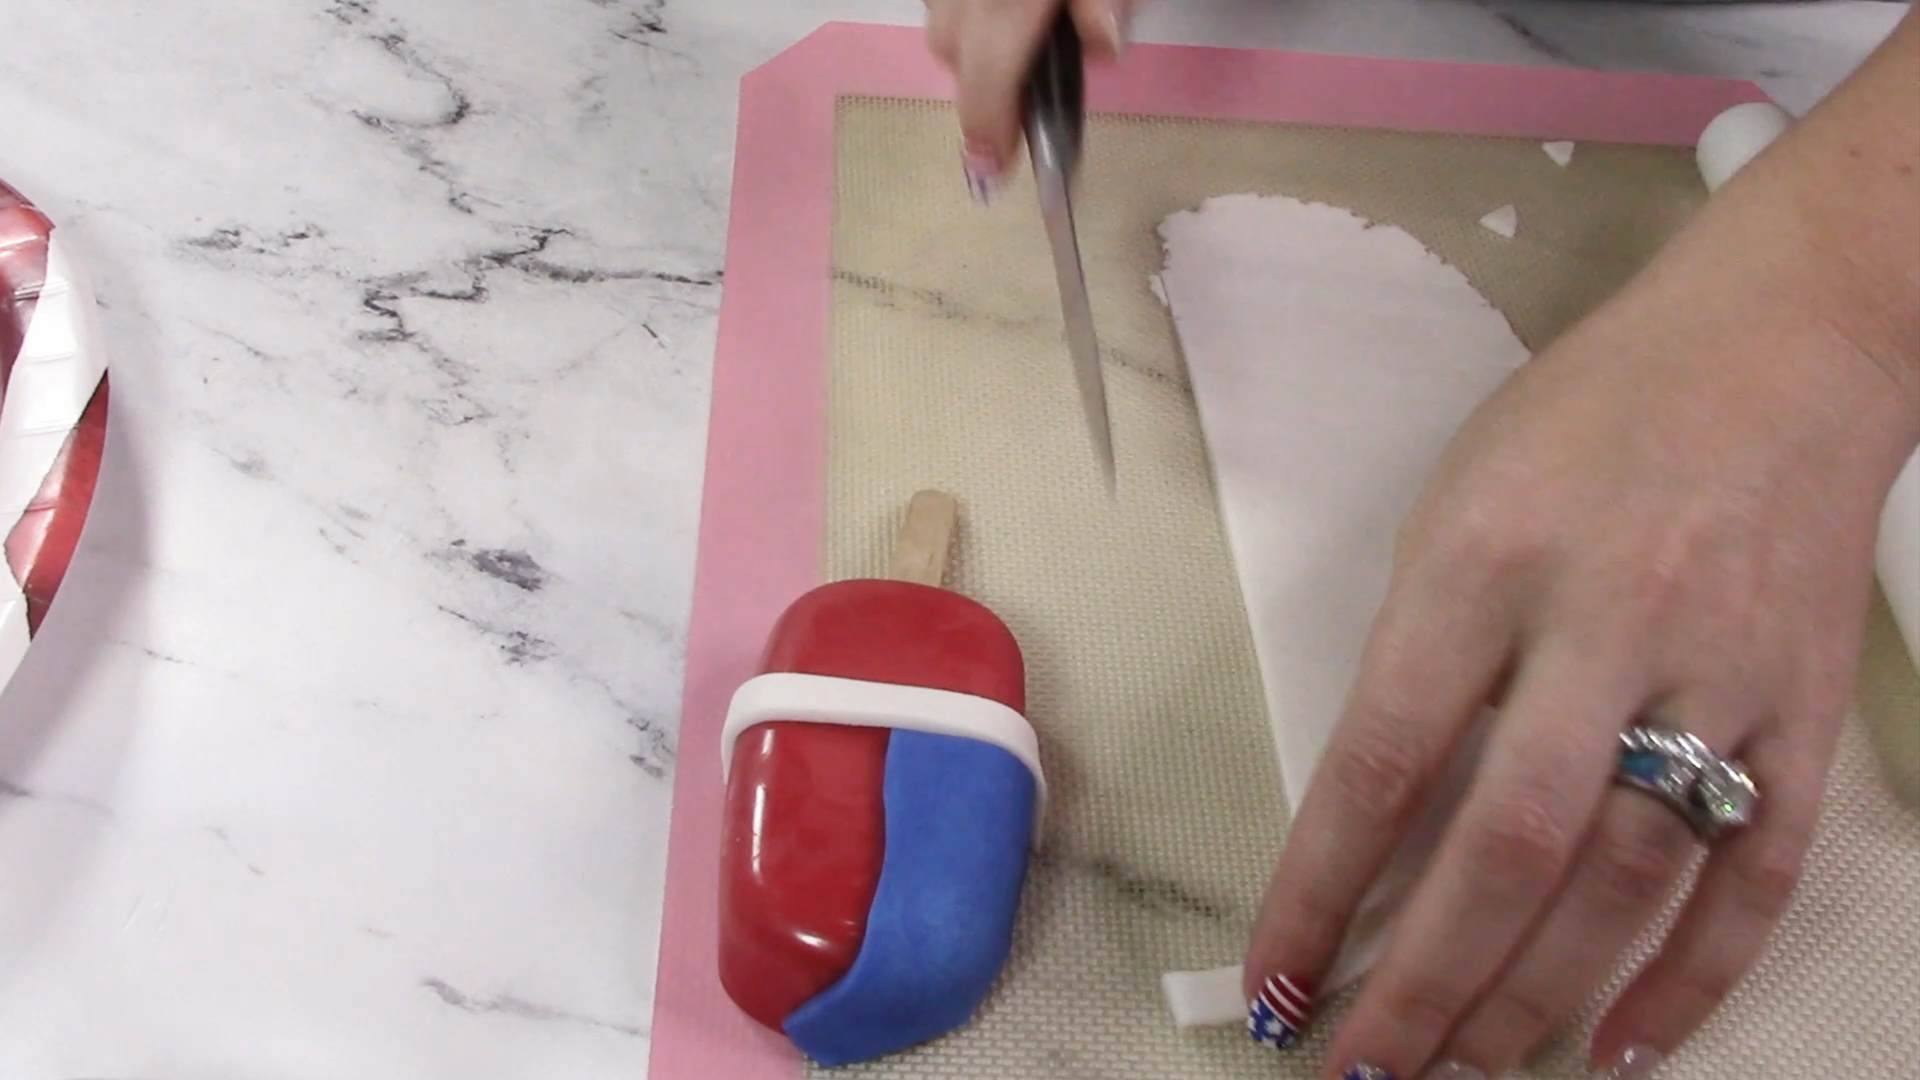
Next roll the white fondant into a long piece for the stripes. Slice away the end so you start with a straight edge. Then cut your first stripe. Cut off the ends so you work with all straight pieces and use some more water to act as glue. Place the stripe flush with the blue to act as a guide and trim the ends. Then repeat to create more stripes.
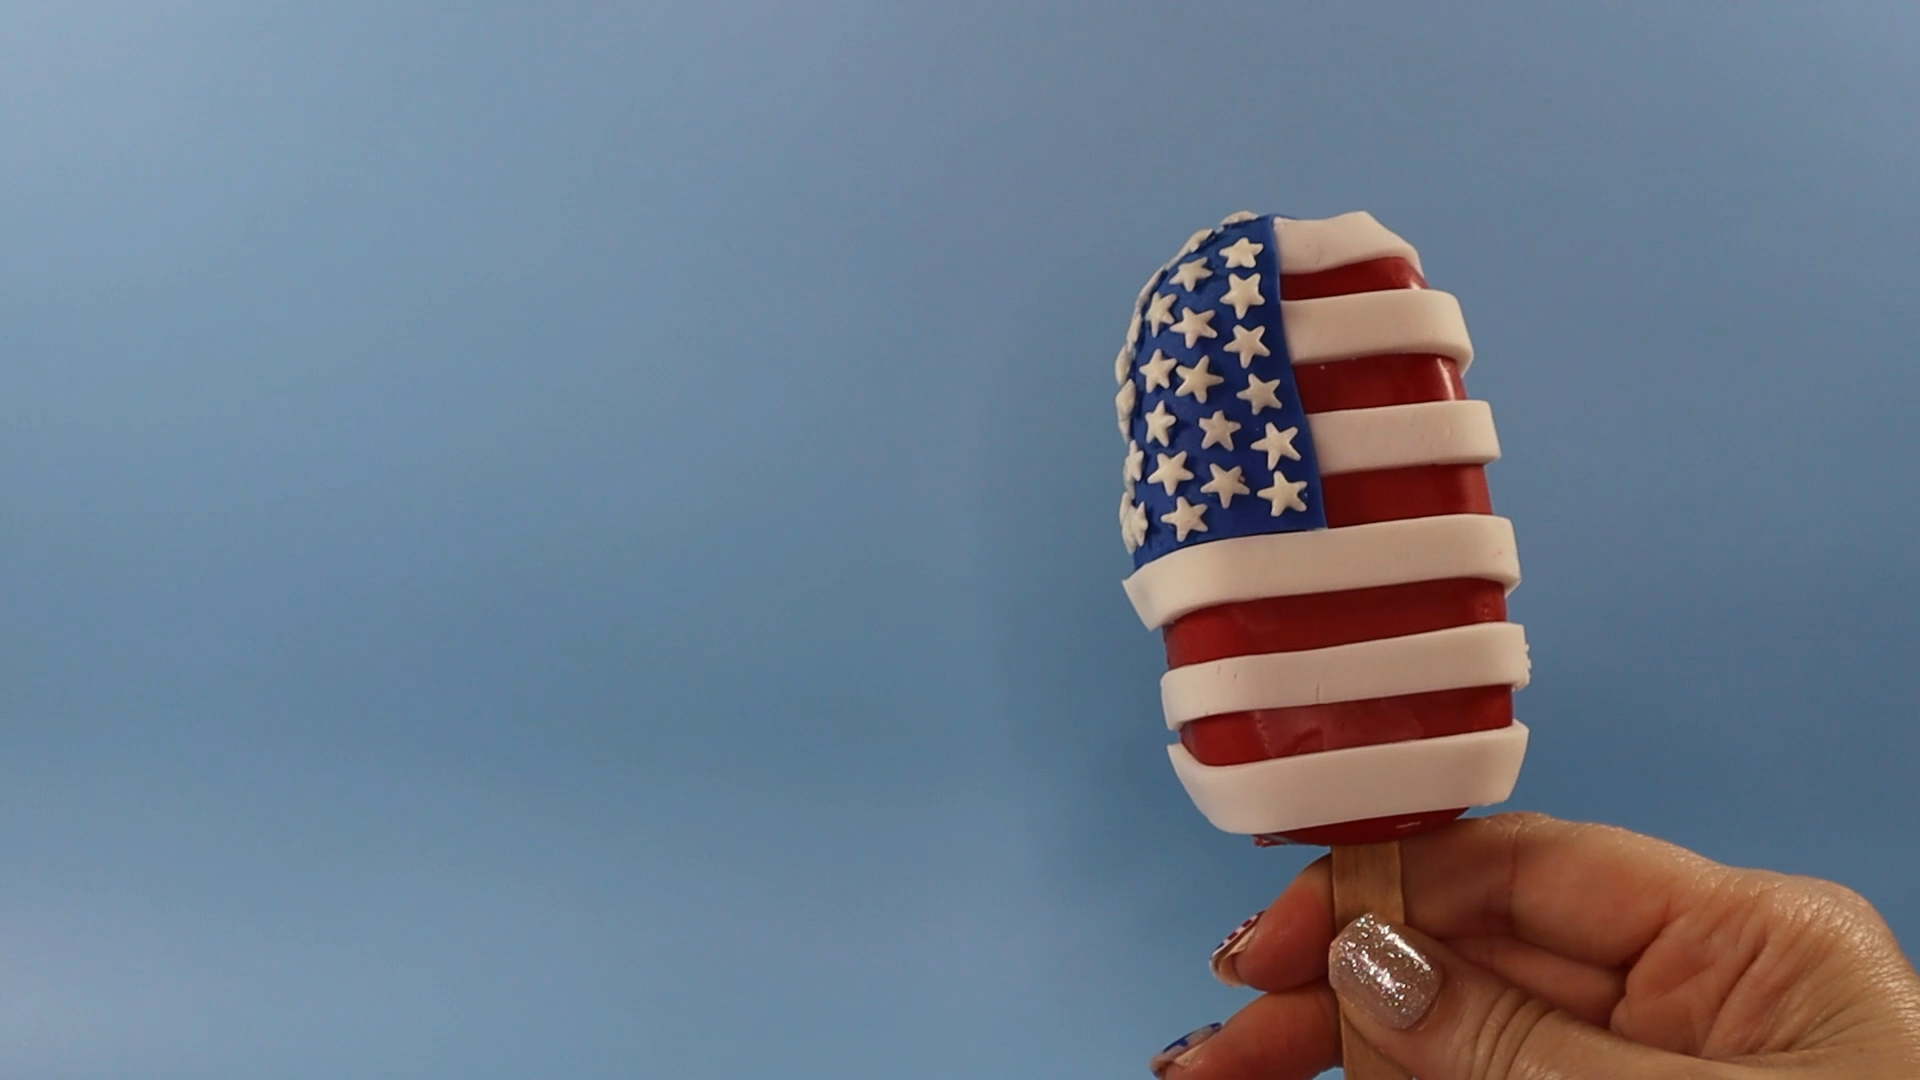
Time for the stars. I actually sifted through my sprinkles to find the white stars for this and it was totally worth it. Using a piping bag, dot blue chocolate on the flag part for where the sprinkles go. Then carefully add a star to each dot. By using blue chocoalte, it will camouflage any bits of chocolate peeking out from behind the star. Continue adding more chocolate across the blue and continue covering with stars, gently guiding each into place.